

One exciting development in DeFi is the possibility to access new Cosmos Network DeFi platforms. You can access them straight from Coinbase. To do this we will require ownership of ATOM (can buy on Coinbase) a Keplr wallet extension for Brave and we will connect to https://osmosis.zone in order to earn OSMO governance tokens.
This guide will walk you through how to use Osmosis’s key features from start to finish. For the sake of simplicity, we’ve divided this guide into three main sections:
Funding your Osmosis account with ATOM
Swapping assets (Atom for OSMO)
Providing liquidity
1. How to Fund Your Osmosis Account
Step 1.1: Buy ATOM
You can purchase ATOM from every major exchange in the world. Below are a number of exchanges you can use:
Step 1.2: Install the Keplr Wallet browser extension
In order to use Osmosis you need to create a Keplr Wallet. Go to the chrome web store and click the “Add to chrome” button at the top right of your screen.
Step 1.3: Create a Keplr wallet
Once you’ve installed the Keplr Wallet browser extension follow the instructions in this Keplr wallet setup guide.
Step 1.4: Send ATOM to your Keplr Wallet
Step 1.5: Open Osmosis
Now that you have ATOMs in your Keplr Wallet, you’re going to want to open Osmosis.
Step 1.6: Connecting your Wallet
Once you’ve opened the Osmosis web app, you need to connect your Keplr Wallet. Sign in to your Keplr wallet extension if you haven’t yet, and click “Connect Wallet” at the bottom left of the Osmosis page.

Step 1.7: Depositing assets into Osmosis
Now, this is the first time you’ll be using IBC! In order to use Osmosis, please follow these next steps:
You need to transfer your assets from your Keplr wallet to Osmosis by using Inter-Blockchain Communication Protocol (IBC). IBC enables different blockchain protocols built with Cosmos SDK to exchange value between each other.
Go to the menu on the left of the Osmosis page and click “Assets.” On the Assets page, there is a list of available assets including ATOM. Immediately to the right of ATOM you’ll see a “Deposit” button. You’ll want to click deposit

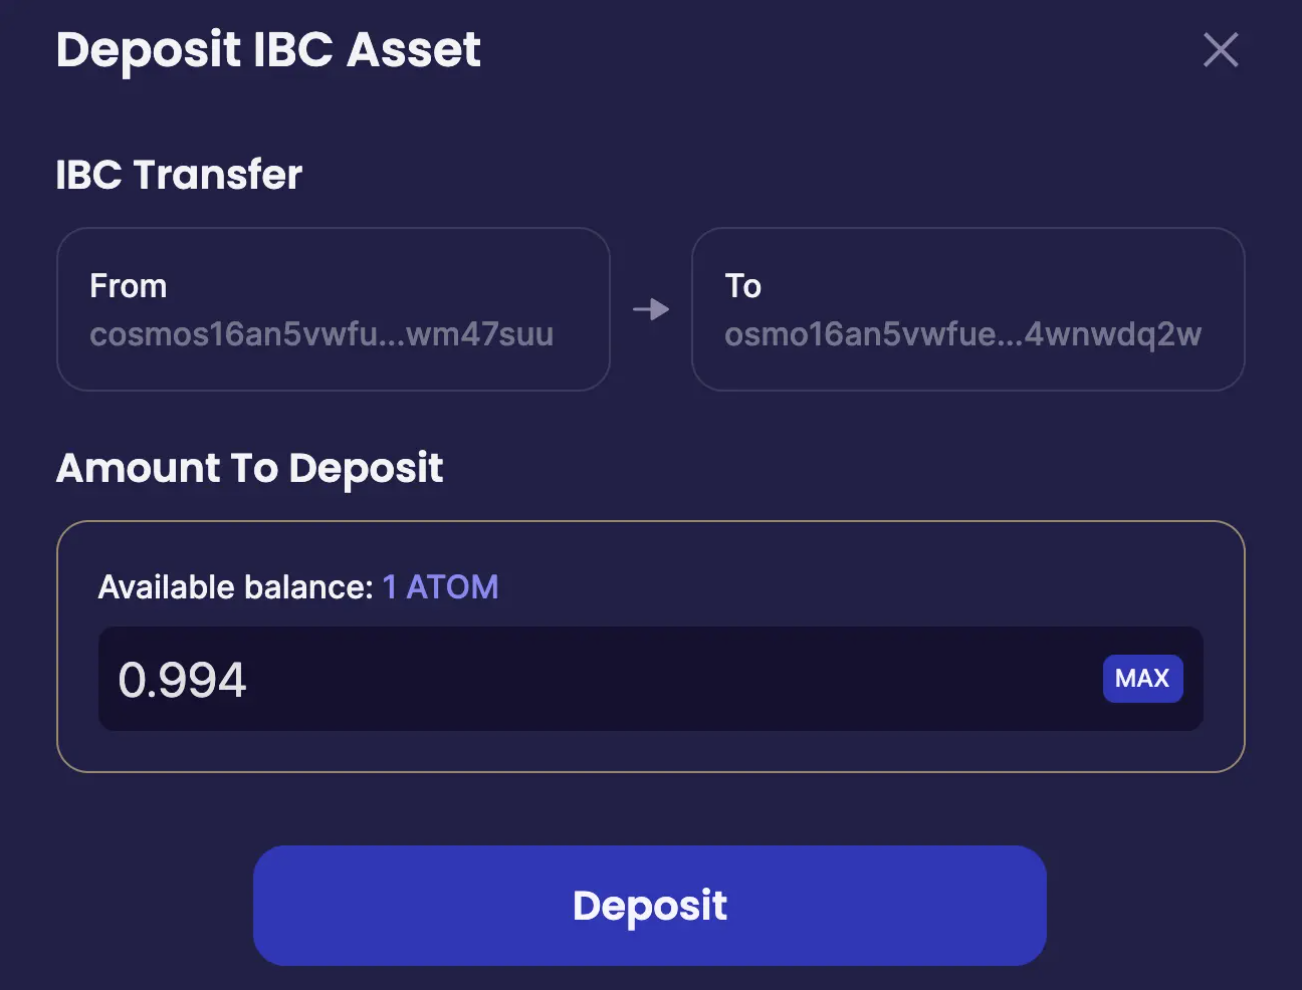
There are instances where IBC assets take a few minutes to populate. Be patient and refresh your screen.
2. How to Swap
Step 2.1: Swapping
Now you’re ready to swap! Click on the “Trade” tab located at the top left of your screen on Osmosis.
Go ahead and choose which assets you’re swapping from and to. For the purposes of this guide, we’ll be swapping ATOM to OSMO. Because of the set ratio of the OSMO <> ATOM pool, you will want to swap 1 / 2 of your ATOM into OSMO in order to provide liquidity to the pool. (later)
**Important: you need OSMO for gas fees in order to make any trades or add liquidity to a pool. Osmosis has provided a nifty feature to get you started. You can swap atom for OSMO with no gas, by selecting "low” (0$) as the gas fee, it will allow the trade to go through.


Swap ATOM for OSMO
3. How to Add Liquidity to a Pool
For some of you the journey hasn’t ended and by this point you already have both ATOM and OSMO and are ready to add liquidity to the ATOM <> OSMO pool on Osmosis.
Step 3.1: Choosing a pool
Click the “Pools” button on the options menu to the left of the Osmosis page and you’re going to see a number of liquidity pools from the Cosmos ecosystem that are supported and IBC-enabled.
Each card will show you the Pool number, the asset pair in that specific pool, the estimated APY for providing liquidity, and the pool’s overall liquidity.
For the sake of this guide you’ll be choosing Pool #1, the OSMO <> ATOM pool.
Step 3.2: Adding liquidity
You’ve chosen the OSMO <> ATOM pool, now you need to add liquidity to that pool. In order to do that, click the “Add / Remove Liquidity” button at the top of your screen. Remember that the OSMO <> ATOM pool is a 1-to-1 pool, meaning 50% of the value of the pool will be in OSMO and 50% will be in ATOM
Add the amount of ATOM and OSMO you would like to provide to this pool to become a Liquidity Provider and earn OSMO and ATOM rewards, as well as OSMO pool incentive rewards.
Click Pool #1

Click the “Add / Remove Liquidity” Button

*Make sure to leave around 1 OSMO for gas in your account to process transactions.
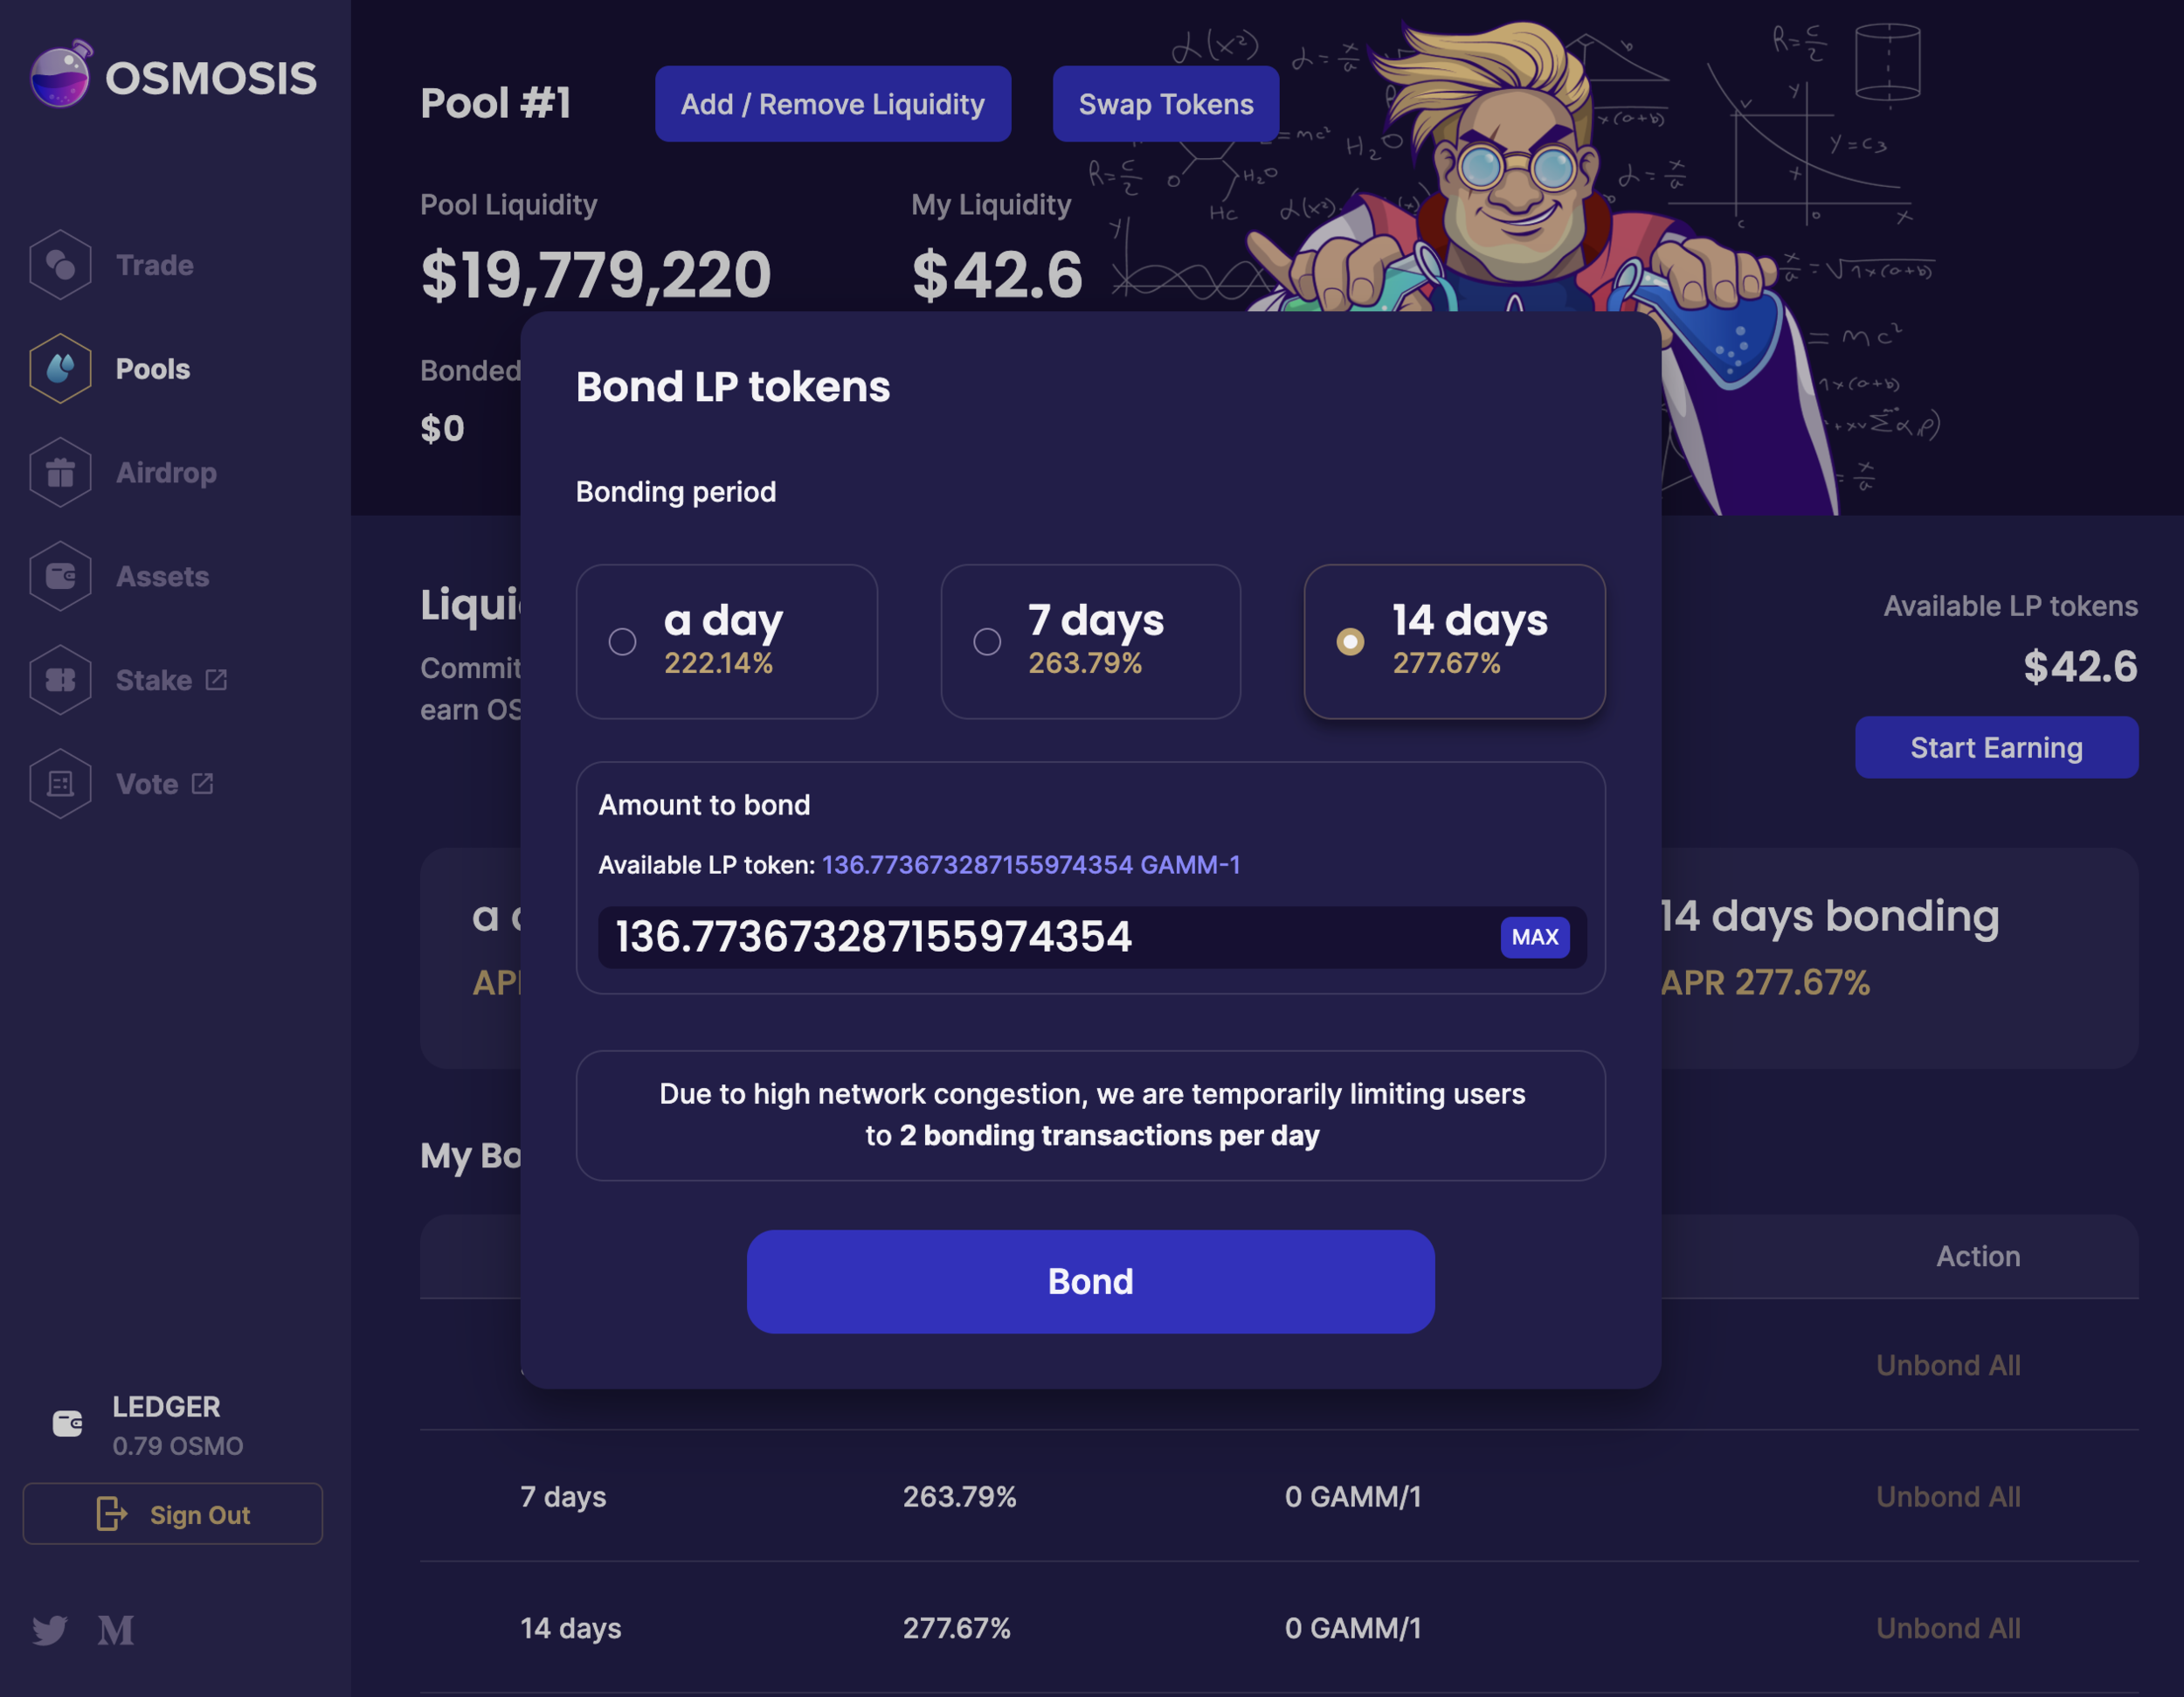
Step 3.3: Bonding your LP Tokens
This is the final step and an important one.
45% of daily issuance of OSMO rewards will go towards incentivizing liquidity providers to bond their LP tokens to promote long-term liquidity on Osmosis’ AMM. Osmosis users can also choose to bond their LP tokens after providing liquidity. Similar to OSMO staking, LP tokens remain bonded for a certain length of time, except users are allowed to choose the length of their own unbonding period.
You’ll see three bonding gauges below: 1 day, 7 days, and 14 days with the respective APY of each pool. You can choose to unbond your LP tokens at the end of whichever gauge you choose.
Once you’re done selecting which gauge you prefer, click bond, and you’re done!
You will begin to see your OSMO rewards in your wallet in about 24 hours. It could be less, depending on the time of deposit. To see when the next reward distribution will be, click “Pools”
This post was adapted from https://akash.network/blog/how-to-access-and-provide-akt-token-liquidity-on-osmosis. Thanks!